Lip Flip Treatment, No Dermal Filler Required!

A lip flip can make your lips look fuller without the need for surgery or dermal filler. Strategically placed injections of muscle relaxant cause the upper lip to “flip” upwards and outwards to appear fuller without adding any new volume. 

Treating the Lips

The lip flip is a minimally invasive treatment that subtly changes the shape and projection of the lips, so they appear plumper and more defined. Your practitioner will use anti-wrinkle injections to target the edges of your lips and the corners of the mouth. The injections relax the muscles around the mouth so that the lips “flip” and appear fuller and more youthful. 

Who Is Suitable To Have This Treatment?

This treatment is suitable for men and women in good health wanting to achieve fuller and more defined lips without surgery or dermal fillers. It’s a good treatment option for people who wish to reduce a “gummy smile” and those who feel their top lip rises higher than normal when they smile. 

What to Expect

A lip flip treatment can create the appearance of plumper and fuller lips through injections of muscle relaxants. It’s a minimally invasive procedure that doesn’t involve any painful side effects or extended downtime. 

Your practitioner will use a thin needle to inject targeted areas of the lips and mouth. As the injections are applied, you may experience a mild pinching sensation. In some cases, a topical anaesthetic will be applied before treatment to minimise any discomfort. 

The injections cause the orbicularis oris muscle around the mouth to relax and “flip” the upper lip so it appears fuller and more prominent. The entire lip flip procedure only takes around 20 minutes. 

Once the upper lip augmentation is complete, you can immediately return to work and social activities. You can expect to see results within a few days, with the full effects visible around 14 days post-procedure. 

What’s the Difference Between a Lip Flip and Lip Fillers?

Lip flips and lip fillers can both enhance the lips for a fuller and more youthful pout. But there are differences in how these cosmetic procedures work and how long they last.

With a lip enhancement using facial fillers, the product is injected into the lips to add volume. Lip fillers make your lips plumper, with the effects lasting for up to 6 months.. 

With a lip flip, a small amount of muscle relaxant is used to change the shape and projection of the lips. While the lips appear fuller, there is no increase in volume. The effects of a lip flip procedure last for around 1-3 months before a top-up treatment is required. 

Your cosmetic doctor may recommend a combination of dermal fillers and a lip flip to help you achieve your desired results. 

When Can I See the Results?

You will start to see noticeable results within a few days of your lip flip treatment. Results will continue to improve over the next 10-14 days, with the full effects of treatment visible after 2 weeks. 

How Long Does a Lip Flip Last?

Lip flip results are not permanent. You can expect results to last for around 1- 3 months after your lip flip treatment. The effects of the injections will begin to wear off after this time. 

Many people choose to maintain their results with an additional lip flip procedure when the effects of the initial treatment session begin to fade. 

Does a Lip Flip Hurt?

Lip flip is a minimally invasive treatment and is generally painless. However, if you have low pain tolerance, your practitioner may apply a topical anaesthetic to minimise any discomfort during the lip flip treatment session. 

Can I Get a Lip Flip and Lip Fillers?

Yes, you can get both a lip flip and lip fillers. The combination of these cosmetic procedures can provide a more dramatic lip augmentation. The lip flip can change the shape of your lips to make them appear more prominent, while the lip filler can add volume for fuller-looking lips. 

Your clinician may recommend a combination of a lip flip and lip filler to help you achieve your aesthetic goals. 

Is There Any Downtime?

It’s common to experience mild bruising and swelling for the first 12-24 hours after a lip flip procedure. Sometimes, these side effects can last for a few days post-procedure.

If you want a lip enhancement for a special occasion, we recommend booking your lip flip treatment around 2 weeks before the event. This will leave enough time for the treatment to take full effect and for any side effects to subside. 

Can I Eat or Drink After Getting a Lip Flip?

You can eat and drink after a lip flip. But it’s important to avoid hot beverages and foods that can irritate your lips. It’s also a good idea to avoid messy foods that could cause you to wipe or apply pressure to your lips for the first few days post-treatment. 

Your practitioner will also recommend that you avoid using drinking straws for 72 hours as puckering your lips could disturb the muscle relaxant and cause it to migrate. 

How Do I Prepare for a Lip Flip?

There is very little preparation required for a lip flip. 

For 48 hours before the cosmetic procedure, you should avoid alcohol consumption and smoking to minimise the risk of side effects and speed up the healing process. 

It’s also important to stop taking any blood-thinning medication, including aspirin. These medications can increase the risk of bruising and swelling post-treatment. 

You should tell your practitioner about any medications and supplements you take during your initial consultation at b clinic. The consultation is also an opportunity for you to ask any questions you have about lip flips. 

What To Expect After a Lip Flip?

Following a lip flip procedure, you may experience mild swelling and bruising around the injection sites. These side effects are temporary and should subside within 72 hours. 

Your practitioner will provide aftercare instructions to help you manage any side effects and ensure optimal treatment results. This can include avoiding strenuous exercise for 48 hours, not wearing makeup for 24 hours, and avoiding saunas, hot showers, and sun exposure for around 1 week. 

Possible Risks and Complications

Lip flips are a minimally invasive treatment considered very safe and low risk. The most common side effects are mild bruising and swelling around the injection sites for the first 48 hours post-procedure. 

There is a risk of more severe complications if an inexperienced or untrained practitioner performs the procedure. If too much muscle relaxant is injected, it can result in the inability to form certain words and difficulty whistling or closing the mouth. These side effects will subside as the muscle relaxant wears off. 

As with all injections, there is a small risk of infection. In rare cases, muscle relaxant injections can cause headaches and fever. If you experience these symptoms or have difficulty breathing or blurred vision, you should contact a trained medical professional immediately. 

How Much Does a Lip Flip Treatment Cost?

The cost of a lip flip depends on several factors, including your desired treatment outcomes. Generally, a lip flip is more affordable than dermal fillers. To find out if you are a good candidate for a lip flip and receive a cost estimate, schedule a complimentary consultation at b clinic.

Can You Drink Alcohol After or Before Lip Treatments?

Lip filler injections

Beautiful soft lips are all over social media. A natural fuller pout can make you look and feel more youthful and attractive.

So it’s no surprise that lip fillers are one of the most requested cosmetic procedures in Australia. The non-invasive treatment can be performed during your lunch break. It also has one of the highest patient satisfaction rates.

But there are a few do’s and don’ts when it comes to lip augmentation. You can achieve the best possible results and avoid complications by sticking to the aftercare instructions provided by your injector.

In this guide, we’ll reveal the things you should avoid before and after getting lip fillers.

Here’s what you need to know.

Can You Drink Alcohol Before Lip Filler Injections?

You should avoid drinking any alcohol for 24 hours before lip filler injections. This is because alcohol is a vasodilator.

In simple terms, alcohol causes your blood vessels to dilate and widen. This means the blood vessels in your lips take up more space beneath the skin, increasing the risk of bruising.

Alcohol can also cause fluid retention and increase the risk of swelling.

After getting lip fillers, you want to be able to see the full results of treatment as soon as possible. Avoiding alcohol may help you enjoy your new look faster, rather than waiting for bruising and swelling to subside.

Can You Drink Alcohol After Lip Filler Treatment?

We recommend avoiding alcohol consumption for at least 24 hours after getting lip fillers. This is because of the same reasons mentioned above.

The tiny needles used during lip augmentation minimise the impact on your skin, but they still cause small puncture wounds that the body needs to heal. In addition, drinking alcohol during the healing process can thin the blood and increase the risk of post-procedure bruising and swelling.

It’s best to avoid alcohol to keep the recovery period as short as possible. Then, after a few days, you’ll be able to enjoy your beautiful new lips.

Does Alcohol Cause Bruising?

Alcohol can make you more prone to bruising. And we’re not talking about the extra bumps and knocks you may experience after drinking a few too many glasses of wine.

As mentioned above, alcohol is a vasodilator. It causes the blood vessels to expand, which increases the blood flow on the surface of your skin. That’s why some people get rosy cheeks when drinking alcohol.

The increased blood flow means blood vessels are more likely to rupture from trauma. When a blood vessel is damaged, blood leaks into the surrounding tissue. That’s the purple colour you can see with bruising.

What Will Happen if I Drink Alcohol After Getting Lip Fillers?

Alcohol is a vasodilator that acts as a blood thinner. If you consume alcohol after lip injections, it could cause your blood vessels to expand and result in more blood flowing to the skin’s surface. This can increase the risk of burst blood vessels around the injection sites. The increase in blood flow can also make any bruising and swelling worse. 

Is Swelling After Lip Fillers Normal?

It’s not unusual to experience some swelling after lip fillers. Most people report that swelling is most noticeable the morning after the lip filler procedure. However, this is a temporary side effect that shouldn’t last longer than a few days. 

You can minimise the risk of swelling by following the aftercare instructions provided by your practitioner. You should avoid certain things to reduce the risk of swelling and other side effects, including avoiding alcohol consumption. 

Avoid Strenuous Exercise

Skipping the gym for the first 24 hours after lip filler injections is a good idea. Strenuous exercise causes your heart rate and blood pressure to increase, making side effects like bruising and swelling appear worse.

A good workout will also cause you to sweat, dehydrating the skin and irritating the injection sites.

Dermal fillers are made from a substance called hyaluronic acid. It’s a natural sugar-based substance that attracts and retains water to plump your lips from under the skin. You can go for a walk to stay active, but you should avoid strenuous exercise for the first 24 hours.

Can I Drink Coffee After Lip Fillers?

There is a common misconception that caffeine can cause dehydration. However, there is no scientific evidence that mild caffeine intake will cause dehydration, which could affect the results of lip augmentation.

However, there is a risk of burning your lips with hot beverages following lip filler injections. Your lips may feel sore and slightly swollen and will be numb from the local anaesthetic for a while after the procedure.

It’s best to stick to room temperature drinks to stay hydrated for the first few hours post-treatment. You should also avoid using a straw for drinking, as puckering your lips can cause pressure that disturbs the dermal filler product.

Avoid Air Travel for a Couple of Weeks

The air in a plane cabin can also dehydrate your skin, affecting the dermal filler product and stopping you from achieving optimal results.

You’ll be able to fly a couple of weeks after lip filler injections, but you should stay on the ground and keep yourself well hydrated until the filler product has settled.

Don’t Smoke After Lip Filler Injections

You will achieve better results and reduce the risk of side effects if you give up smoking before and after lip fillers. Not only does smoking dry your skin, but it can also lead to more severe side effects.

A 2010 study showed that smokers have an increased risk of infection after dermal filler injections.

It’s best to quit smoking for good, but you should avoid smoking for at least 24 hours after lip fillers.

How Long After Anti-Wrinkle Treatment Can I Drink Alcohol?

Like dermal fillers, it’s best to avoid alcohol for 24 hours after anti-wrinkle injections. Alcohol thins the blood and causes the blood vessels to dilate, increasing the risk of bruising and swelling.

Avoiding alcohol can help you achieve optimal treatment results in the fastest time possible. You can enjoy your new look rather than waiting for bruising and swelling to subside. We recommend avoiding alcohol for 24 hours before and after anti-wrinkle injections.

Can You Eat After Lip Fillers?

Yes, you can eat after lip augmentation as long as you are careful. If a topical or local anaesthetic is used, you should wait for the numbing effect to wear off before eating anything. This can take up to an hour.

It’s also a good idea to avoid foods that are messy or difficult to eat. You don’t want to rub or wipe your mouth too much following lip fillers, so try to stick with foods that are easy to eat. You should also avoid extremely salty foods as they can irritate your lips.

Can You Take Painkillers After Getting Lip Fillers?

Most people find that they do not need any pain medication after lip fillers. However, if you do require painkillers, you can use over-the-counter paracetamol.

You should avoid anti-inflammatory painkillers like aspirin and ibuprofen. These types of pain medication can cause blood thinning that increases the risk of bruising. You should also avoid taking any vitamin E and fish oil supplements the week before and after your treatment.

If your lips feel sore or you experience swelling, a cold pack is the best way to alleviate the symptoms. You can wrap an ice pack in a clean towel or cloth and gently apply it to your lips as needed.

Read more tips on how to care for your lips after fillers in our interview with Dr Elle.

When Can I See the Final Results?

Lip fillers provide immediate results. After the procedure, you will notice your lips are fuller and more youthful. It can take a few days for any swelling or bruising to subside.

Around 2 weeks after lip augmentation, the dermal filler product will settle, and you will be able to see the final results. You can expect your lip enhancement result to last 6-8 months before a top-up treatment is needed to maintain your look.

Are Lip Fillers Safe?

Lip fillers are safe when performed by a trained practitioner. Most dermal fillers are made from a gel like substance that naturally occurs within the body. One of the benefits of using this type of product is that the filler can be dissolved using an enzyme if necessary. 

It’s important to choose a trusted cosmetic clinic with experienced staff for your lip filler treatment. The placement of the injection sites is the most significant factor regarding the safety of lip fillers. When performed by an inexperienced practitioner, dermal fillers can cause vascular occlusions and other unwanted side effects. 
If you want to find out if you are a good candidate for lip fillers, schedule a free consultation at b clinic today.

Décolletage Treatments Designed to Refresh, Smooth and De-Wrinkle

Decolletage treatments
Having lovely, smooth, blemish-free skin makes you feel more beautiful and confident. But beautiful skin doesn’t just stop at your chin. Give your décolletage some extra love this month with our special skin treatment package designed to make you want to wear the hottest plunging necklines this summer. Our décolletage treatment improves skin texture and tone through a combination of laser therapies and cosmetic injectables. You can combat sun-damaged skin, eliminate broken capillaries, and refresh your décolletage for the summer.

Restoring and Renewing the Décolletage

Your décolletage will probably show the signs of ageing first. The skin there is very fragile and produces less oil, so sun damage shows up faster than on our faces. It’s also part of the body that is often most exposed to UV rays. As we age, gravity and UV damage weaken the skin’s support structure in the décolletage. Further loss of collagen leads to skin sagging, visible horizontal rings around the neck, a crepey texture and creases, and visible skin discolouration.

Sun Damaged Skin

The décolletage is usually highly exposed to the sun. While we protect our faces with sunscreen, we often overlook the chest and décolletage. Over time, repeat sun exposure breaks down the collagen fibres in the skin, leading to chest wrinkles, crepey skin, and changes in pigmentation. 

Hyperpigmentation and Broken Capillaries

Discolouration and uneven skin tone are some of the most common décolletage skin concerns. Known as poikiloderma, the skin on the neck and décolletage develops a dark red/brown discolouration. Broken capillaries can also change the skin’s tone, with red spider veins appearing across the décolletage.

Chest Wrinkles

A drop in collagen and elastin production causes fine lines, wrinkles, and sagging skin. Over time, the loss of these essential proteins results in a deterioration in skin integrity. Many people notice that décolletage wrinkles are more prominent in the morning. If you’re a side sleeper, you might be seeing some tell-tale chest crinkles appearing. Curling up on your side to sleep can cause noticeable sagging that increases as you get older.

Décolletage Treatments

You can target your décolletage area with treatments designed to refresh, smooth and de-wrinkle. Just in time for the summer sun, our November Full Déc package aims to create more youthful, beautiful skin around your chest and cleavage, preventing and treating visible signs of ageing in this delicate area. Over two treatments – Picosure laser or IPL (depending on your skin type) and Beauty Booster – we’ll target:
  • Sun damage
  • Sunspots
  • Unwanted freckles
  • Pigmentation
  • Wrinkles and lines (including sleeping crinkles)
  • Broken capillaries and redness.
The skin in the décolletage area is delicate and sensitive. But it usually responds well to treatment. You can get smoother and younger-looking skin with our two-step décolletage treatment. 

What’s Included in Décolletage Treatment?

To target crepey skin, sagging, and other visible signs of ageing on the décolletage, it’s important to treat the deeper layers of the skin as well as the skin’s surface. We can achieve more dramatic results by targeting the deeper dermal layers of the skin.  Our décolletage treatments stimulate new collagen production while restoring volume and hydration. Your skin will appear fresher, smoother, and more youthful. 

Treatment 1: Laser Therapy or IPL

At your first treatment, your b clinic practitioner will assess your skin type and condition and choose either PicoSure Laser or IPL to refresh the décolletage area. PicoSure with focus lens array and Revlite lasers gently and effectively target unwanted pigmentation and skin discolourations while increasing elastin and collagen production.  You’ll see an improvement in overall skin quality, and your skin will appear smoother, suppler, and more even toned. IPL (Intense Pulse Light) uses high-intensity light to address skin imperfections. It can promote collagen formation, improving overall skin quality and texture. It’s great for spider veins, port wine stains and rosacea, pigmentation, and freckles. Both of these treatments are gentler on the skin than many laser treatments. As a result, there’s little to no downtime and minimal risk of unwanted side effects. 

Treatment 2: Beauty Booster

After 2-4 weeks, you’ll come back for your second décolletage session, a Beauty Booster 1ml treatment. Beauty Booster Treatments have a plumping effect on your skin, improving its elasticity, texture and hydration. They make your skin glow with healthy vitality. Your skin will have better colour, be less creased, and be more hydrated and supple.  The décolletage treatment uses a unique formula of hyaluronic acid dermal filler, vitamins, and other active ingredients to replace lost moisture and plump up the skin from within.  Beauty Booster treatments replenish the essential building blocks for healthy skin and leave you with smoother, firmer, and more youthful skin.  BONUS: We’ll also throw in an amazing skinvigor8 pad. Valued at $43, it’s designed to prevent and repair chest wrinkles while you sleep! Simply pop it on at night to banish décolletage lines by the time you wake. Please note that while you’ll likely see immediate results for all of these treatments in just one session, you may require multiple skin treatments to achieve optimal results. Your clinician will recommend a treatment plan during your free consultation at b clinic.   Boost your décolletage skin’s beauty today. Book a Full Déc Package now

Why Is My Skin Peeling and Dry?

Peeling dry skin is one of the most annoying skin concerns to deal with. When your skin feels tight and looks rough and scaly, your self-confidence drops off a cliff. 

Trying to conceal dry and peeling skin can make things worse. Makeup can cling to the dry patches and make your complexion look even flakier. 

So what causes dry skin and peeling? And what can you do about it?

That’s what we’re going to reveal in this expert guide. 

Why Is My Skin Peeling?

Skin peeling is usually the result of the top layer of skin flaking away due to inflammation, allergies, or irritation. The very top layer of dead skin peels away from the other cells. 

Some people are more likely to experience dry and peeling skin than others. So what causes dry skin?

Dry and Flaky Skin on Face Causes

There are many potential causes for peeling skin on the face and areas of the body. Before you can put together a rescue plan for your skin, you need to determine the cause.

Let’s take a closer look at the most common causes of peeling skin. 

Sunburn

If you’ve spent a summer’s day outside and come home with a fiery red complexion, you’ll already know that sunburn is one of the leading causes of peeling skin. The sun’s UV rays damage the skin cells, disrupting the function of the top layer of skin. 

Sunburn initially appears red and sore before entering a peeling stage as the dead, damaged cells flake off the skin. 

Prevention is the best way to stop this type of skin peeling. Apply a high SPF suncream to prevent sunburn. Sun exposure is also one of the main causes of skin ageing, so you’ll help your skin look younger by protecting it from UV rays. 

Dry Skin

Dry skin is a common skin concern that affects lots of people. While some people experience dry skin more than others, certain things can make the condition worse. 

Air conditioning units are notorious for removing moisture from the air and creating a low humidity environment that worsens dry, itchy skin. Hot showers and harsh skincare products can also strip the skin of moisture. 

When the skin is dry, it can become itchy and feel tight. Eventually, the dead, dry skin cells start to peel. 

Seborrheic Dermatitis

Seborrheic dermatitis of the scalp is known as dandruff. But this condition can also affect the face and other areas of the body. It’s caused by yeast that grows on your skin, provoking an immune response. 

Affected areas can feel itchy and sometimes result in flaky patches and peeling skin. This condition typically affects people with oily skin. 

Contact Dermatitis

Contact dermatitis is a skin reaction caused by direct contact with an irritant or allergen. 

When your skin comes into contact with something you’re allergic to, it can cause an immune response that appears as a rash. The skin can become dry and flaky, with some people also experiencing small blisters. 

Allergic contact dermatitis can be triggered by certain plants, fabrics, or through active ingredients in skincare products.

Irritants can also cause contact dermatitis. Harsh soaps and skincare products containing alcohol can irritate the skin and cause contact dermatitis. 

Eczema

Around one in 10 Australians will develop eczema at some point during their lifetime. This condition can cause the skin to become itchy, red, and dry. The inflammation can also cause peeling in the patches where the eczema is most severe. 

Eczema is generally a chronic condition that worsens during the winter months. The condition causes the skin barrier to be less effective at keeping out irritants and bacteria. 

If you suffer from eczema, you’re more likely to experience contact dermatitis due to allergens and irritants coming into contact with the skin. 

Psoriasis

Psoriasis is another skin condition that can cause flaking and scaling. It usually appears as red patches of thick skin. For most people with psoriasis, the condition causes flaking of the skin rather than peeling. 

Psoriasis is an autoimmune condition. Part of the immune system becomes overactive and attacks healthy cells. While most people shed skins cells every 28 days, cell turnover for those with psoriasis is much faster.

Like eczema, the best way to treat psoriasis is to develop a skincare regime that helps control and prevent breakouts. In addition, your doctor may prescribe topical steroid creams and ointments to reduce the inflammation. 

How To Treat Peeling Skin at Home?

The best treatment for peeling skin depends on the cause. You should always allow the skin to heal and not be tempted to pull off flaking and peeling skin. 

You can prevent peeling skin by keeping your skin nourished and hydrated. Here are some top tips you can try at home. 

Pat Your Skin Dry After Showering

Rubbing your skin dry with a towel after a shower can irritate and dry out the skin. If your skin is already peeling, rubbing will cause it to become more likely to peel. According to the American Academy of Dermatology, you should “blot your skin gently dry with a towel.” Be gentle with your skin to protect it from dryness and flaking. 

Moisturise Every Day

The best time to apply a moisturiser is after a shower or bath. As soon as you step out of the shower, water starts to evaporate from your skin. By using a moisturiser straight away, you can lock in the moisture.

Humidify is one of the best moisturisers to keep dry skin hydrated. It provides intense hydration and aids the function of the skin’s protective barrier. As a result, your skin will feel softer and look smoother. It’s a great product to soothe dry skin.

Use a Gentle Exfoliant

Gentle exfoliation can sometimes be beneficial for dry and peeling skin. However, you should not use any exfoliation products on extremely dry skin or sunburnt skin. This can make the peeling worse and delay the healing process.

Consider adding a gentle exfoliation product like Defy to your skincare regime. Defy is a triple acid exfoliation treatment that uses fullerenes to allow active ingredients to penetrate deeper into the skin. Applying a small amount each evening can help prevent dry skin. 

Best In-Clinic Treatments for Dry Skin

While at-home skincare products can help, professional non-invasive dry skin treatments can provide a more dramatic improvement.

Let’s take a look at the best in-clinic treatment options for dry and peeling skin. 

Beauty Boosters

Topical moisturisers and serums can help to keep the skin nourished. But they can’t penetrate the layers of skin to provide deep hydration. 

The Beauty Booster treatment is one of the most effective ways to achieve lasting skin hydration. It involves multiple micro-injections of tiny amounts of dermal filler, vitamins, and other active ingredients spread evenly across the skin. 

A session takes around 30 minutes and is usually part of a three-part treatment plan. You can expect results to improve for three weeks after each session as the active ingredients rejuvenate the skin from within. 

Medical Microdermabrasion

Microdermabrasion is a gentle treatment that is great for dry and dull skin. It’s a two-part treatment that starts with exfoliation. 

A diamond head handpiece buffs away impurities and exfoliates the treated area. The exfoliation process breaks down the barrier of dead skin cells that stop your skincare products from penetrating deeper into the skin. Once the first stage is complete, a serum infusion or mask is applied. 

Microdermabrasion is one of the most popular lunchtime ‘tweakments’. There’s no downtime, and you’ll see instant results. When you leave the clinic, you’ll have a healthy, glowing complexion. 

Medical Grade Peels

Medical Grade Peels can effectively treat various conditions and concerns, including dry and flaky skin. The treatment doesn’t take long and can be tailored to your unique skin concerns. 

Chemical peels work by removing the top layer of the skin while also cleansing the pores. Your skin will appear brighter, smoother, and more healthy. 

There is little to no downtime for medical-grade peels. Superficial skin concerns like dry skin usually respond well to gentler peels. Our b clinic specialists will recommend the right chemical peel for you during your initial consultation. 

Treating Skin Dryness at b clinic

Dry skin affects most people. But that doesn’t make it any less frustrating when it happens to you. Health and skin conditions can cause dry skin, including a rare genetic disorder known as peeling skin syndrome. So it’s important to see a medical professional if your stubborn dry skin doesn’t improve. 

Prevention is often the best way to keep peeling skin at bay. Regular moisturising and exfoliation should be an integral part of your skincare regime. 

Here at b clinic, we offer a range of cosmetic treatments to combat dry skin and help you achieve a youthful, glowing complexion. Book a free consultation today to discover the best treatments options for you.

How To Treat Hyperpigmentation: Best Treatment Options

How To Treat Hyperpigmentation

Hyperpigmentation is a common skin concern that can appear from nowhere. One day, you look in the mirror and notice little dark patches on your forehead and cheeks. 

This annoying skin discolouration usually develops after you’ve spent too much time outside enjoying the summer weather. 

The bad news is that hyperpigmentation can last for months or years if untreated. 

The good news is that there are many ways to get rid of dark spots, freckles, and sun-induced discolouration. 

Keep reading to learn the causes of hyperpigmentation, how to prevent it from getting worse, and the best ways to treat it.

What Is Hyperpigmentation?

Hyperpigmentation is a condition where areas of the skin become darker than the surrounding skin tone. This is due to the overproduction of the pigment melanin. The melanin forms deposits that appear as darker patches on the skin’s surface. 

The most common cause of hyperpigmentation is sun exposure. The sun’s UV rays trigger the body to produce more melanin to protect the skin. 

This is what causes the skin to tan. But it can also result in excess melanin deposits, causing hyperpigmentation or “sun spots”. 

Hyperpigmentation can also be caused by skin trauma. 

Post-inflammatory hyperpigmentation occurs when the skin becomes inflamed due to a wound or skin conditions like eczema and acne. Dark spots and acne scars develop where the skin tissue has healed. 

In some cases, hyperpigmentation can also result from melasma during pregnancy or as a side effect of certain medications. 

How To Prevent Hyperpigmentation

The best way to prevent hyperpigmentation and stop it from getting worse is to protect your skin with a full spectrum sunscreen. 

Even if you don’t plan to go outside in direct sunlight, applying an SPF30 in the morning is highly recommended. 

Inflammation is the second biggest cause of hyperpigmentation. It’s important to avoid scratching insect bites or picking and squeezing spots and pimples. 

The more inflammation, the higher the risk of developing hyperpigmentation and the worse the area will look later. 

Does Hyperpigmentation Go Away on Its Own?

Hyperpigmentation can fade and go away on its own over time. However, depending on the cause and severity of the discolouration, it can take several years to see an improvement if the area is left untreated. 

Dark patches are easier to remove and see faster improvement when treated quickly. Melanin deposits can grow larger and move deeper into the dermis over time. 

Some types of hyperpigmentation will be permanent unless they are treated.

How To Treat Hyperpigmentation

There are several effective cosmetic treatments that can help get rid of skin discolouration.

To help you understand your options and what to expect, here’s our list of recommended hyperpigmentation removal treatments.

Hydroquinone

Topical creams and serums containing hydroquinone are usually the first steps for treating hyperpigmentation. This active ingredient reduces the production of melanin by inhibiting the enzyme tyrosinase.

You can expect to see some improvement around 10 weeks using a product like Simply Brilliant serum. The results will depend on the severity of the hyperpigmentation, how long it has been there, and how large the discoloured area is. 

Your clinician may recommend hydroquinone as an at-home treatment or as part of a treatment plan that includes in-clinic cosmetic procedures. 

Hydroquinone is usually well-tolerated, but it can cause side effects. Some people experience redness, dryness, and a burning sensation after applying the ingredient to the skin. As with all new skincare products, you should start with a small patch test to see how your skin reacts.

Chemical Peels

Chemical peels are one of the best ways to treat hyperpigmentation. Alpha hydroxy acids (AHAs), glycolic acid, and TCA peels are generally the most effective for skin discolouration and sun-damaged skin. 

These treatments work by removing the top layers of damaged and discoloured skin, revealing more even-toned new skin cells underneath. 

The peel concentration can be tailored to your skin type and pigmentation, with higher strength peels offering faster results but also increased downtime. 

A 2017 study showed that chemical peels provide “excellent cosmetic improvement” as a standalone hyperpigmentation treatment or combined with other skin therapies. 

You may experience redness, tenderness, and flaking skin for a few days following a chemical peel. These are normal effects of the cell turnover process and show the treatment is working. 

Chemical peels can also increase your skin’s sensitivity to the sun. It’s important to avoid sun exposure for the first few days following treatment and protect your skin with sunscreen between sessions. 

Laser Skin Treatments

Laser treatments can be a great way to tackle dark patches and discolouration. These treatments use laser energy to target and break up the melanin deposits in the skin. 

IPL Skin Rejuvenation is one of the most popular laser treatments for hyperpigmentation as it is much gentler on the surrounding tissue. The laser energy is attracted to the darker melanin, breaking up the deposit so new even-toned skin can grow in its place. 

IPL can also be effective for fine lines and wrinkles, spider veins, and a range of other skin concerns. You’ll notice an immediate improvement after a single session, but optimal results are achieved over a series of treatments. 

In a 2016 medically reviewed study, 90% of patients reported they were satisfied with the improvement to their hyperpigmentation and the convenience of the procedure following a series of IPL treatments.

RevLite Laser Toning and fractional laser resurfacing may provide faster results if you have severe hyperpigmentation. However, these Laser Skin Rejuvenation treatments are often unsuitable for darker skin tones. 

In some cases, a combination of laser therapies may provide the best outcomes. Your clinician will recommend a treatment plan based on an assessment of your skin during your free consultation at b clinic. 

Microdermabrasion

Microdermabrasion is a three-step exfoliation treatment that can help to reduce the appearance of pigmentation. 

The treatment begins with an abrasive process. Your clinician will use a handpiece to direct accelerated refined crystals at the area of hyperpigmentation. The crystals blast away damaged and dead skin cells. You may experience a scratchy sensation but no pain. 

Then, a vacuum suction nozzle is then used to remove the crystals and stimulate lymphatic drainage. During the final phase of treatment, a serum infusion is applied to treat the pigmentation. 

The treatment takes around 30 minutes, and there is no downtime. You can expect to see an improvement over a series of treatments spaced four weeks apart. 

Microdermabrasion can be effective as a standalone treatment for mild skin discolouration. For moderate pigmentation, microdermabrasion is often combined with other therapies. 

DermaPen Skin Needling

DermaPen Skin Needling stimulates the body’s natural healing process to address hyperpigmentation. Your practitioner will use state-of-the-art skin needling technology to create micro-channels in the skin.

This stimulates the body’s natural healing process and resets melanin production. As the body floods the area with collagen and elastin, the skin is rejuvenated and appears smoother and more even-toned. 

One of the key benefits of skin needling is that it allows topical treatments like vitamin C serums to penetrate the deeper layers of the skin and have a greater effect.

Vitamin C is an active ingredient with powerful antioxidant properties. It helps to lighten areas of pigmentation and improve skin texture. Your clinician may recommend a daily vitamin C serum as part of your treatment plan. 

You can expect to see an improvement after a single skin needling session. But optimal results are achieved after a series of 3-6 treatments. 

Skin Pigmentation Treatment at b clinic

Hyperpigmentation is a common skin complaint. But there are several treatments to help you get clear and more even-toned skin. 

The best hyperpigmentation treatment for you will depend on the severity and size of the discolouration and your desired results. 

Our team of board-certified doctors and skin experts can identify the cause of your hyperpigmentation and the best ways to treat it. 

Book a free consultation today.

Benzoyl Peroxide vs Salicylic Acid: Which Is Better For Acne?

Benzoyl Peroxide vs Salicylic Acid: Which Is Better For Acne?

Benzoyl peroxide and salicylic acid are two of the most popular acne-fighting ingredients. You’ll find them in a host of acne creams, cleansers and topical treatments. 

But these are two very different active ingredients. 

In this post, we’ll break down the differences between benzoyl peroxide and salicylic. You’ll learn how they work and when to use them. We’ll also look at the best acne treatments to help you get smooth and clear skin. 

What Is Benzoyl Peroxide?

Benzoyl peroxide is an ingredient with strong antibacterial properties. When applied to the skin, benzoyl peroxide kills bacteria that causes acne. It also helps to reduce pimples and pustules.

You can expect to see an improvement in as little as 5 days as it gets to work killing the acne-causing bacteria. Unlike oral antibiotics, your body doesn’t develop a resistance to benzoyl peroxide, so it will continue to work as part of your regular skincare regime. 

Benzoyl Peroxide Pros:

  • Kills the bacteria that causes acne
  • Works fast
  • Prevents antibiotic resistance

Benzoyl Peroxide Cons:

  • Can cause redness, peeling, and skin dryness
  • Some people experience temporary hyperpigmentation 

What Is Salicylic Acid?

Salicylic acid is a beta-hydroxy acid that treats acne by dissolving the dead skin cells, impurities, and excess oil that result in clogged pores. It provides deep exfoliation to clear the skin’s surface and pores to stop acne from developing.

Salicylic acid does not kill bacteria like benzoyl peroxide, but it can leave the skin clearer, smoother, and more even-toned. You can expect to see results around 4-6 weeks after making salicylic acid part of your skincare routine. 

Salicylic Acid Pros:

  • Exfoliates the skin and removes the acne-causing buildup of impurities
  • Anti-inflammatory properties
  • Helps to break down pustules and pimples

Salicylic Acid Cons:

  • Can take a long time to work
  • Overuse can result in side effects

Benzoyl Peroxide vs Salicylic Acid: How Are They Different?

The main difference between benzoyl peroxide and salicylic acid is how they work to treat acne. 

Salicylic acid exfoliates the skin to remove the buildup of impurities that clog the pores and cause acne to develop. Benzoyl peroxide works by killing the bacteria that causes acne. 

Each ingredient tackles a different source of acne. So when should you use these acne-fighting treatments?

When To Use a Benzoyl Peroxide Face Wash

Benzoyl peroxide products are great at killing bacteria, so you should use them when your acne is inflamed and red. If you have many pimples and pustules, benzoyl peroxide can help control the breakout. 

It’s also a good option as a preventive treatment. You can start using it once every 2 days until your skin is used to it. Then, you can make benzoyl peroxide part of your daily routine to keep your skin clear and prevent breakouts. 

When To Use a Salicylic Acid Face Wash

Salicylic acid works by clearing away dead cells, debris, and impurities. If you have lots of blackheads and comedones, salicylic acid can unblock your pores and hair follicles. Bumpy and rough acne-prone skin without many red pimples responds well to salicylic acid. 

Side Effects of Benzoyl Peroxide

While most people don’t experience any side effects, benzoyl peroxide can cause issues similar to other topical treatments.

Common side effects of benzoyl peroxide can include:

  • Skin dryness
  • Redness
  • Peeling
  • Skin irritation

Like salicylic acid, there is also a small risk of an allergic reaction with symptoms including swelling and blisters in the treated area. 

Side Effects of Salicylic Acid

Many people experience a burning sensation when they first start using salicylic acid. This is often accompanied by redness of the skin. While this is normal, you may need to start with a smaller amount of product and use it less frequently until your skin is used to the salicylic acid. 

Common side effects of salicylic acid can include:

  • Inflammation
  • Skin dryness
  • Peeling

Serious side effects from topical salicylic acid are rare, but it’s possible to experience an allergic reaction that includes swelling, itchiness, and skin rashes. 

Is It Safe To Use Salicylic Acid and Benzoyl Peroxide at the Same Time?

Because they target different causes of acne, many people use both salicylic acid and benzoyl peroxide to treat their acne. This allows you to kill the bacteria that causes acne and keep your skin well exfoliated and clear to reduce blocked pores and keep pimples at bay. 

However, using both ingredients at the same time can increase the risk of side effects like redness, dry skin, and peeling. This is most noticeable for people with sensitive skin. 

You can apply each ingredient at different times of the day to reduce the risk of unwanted side effects. Another option is to use the products separately to treat different types of acne.

Salicylic acid can be a good daily treatment to keep your skin clear and prevent future breakouts. If you have an outbreak, you can use benzoyl peroxide as a spot treatment to calm your skin and control the acne. 

Other Acne Treatment Options

Both benzoyl peroxide and salicylic acid can be key tools in your acne-fighting skincare regime. But over the counter products are often not enough to keep your skin acne-free. 

Here at b clinic, our board-certified clinicians are experienced at treating acne and acne scarring with a range of proven treatments. 

Here are the best in-clinic treatments for acne and acne scarring. 

Carbon Laser Facial

A carbon laser facial is an effective way to treat all types of acne. The treatment involves a thin layer of carbon paste being applied to your face. The carbon penetrates deep into your pores and bonds to dead skin cells, debris, excess oil, and other acne-causing impurities. 

When the carbon has dried, your practitioner uses a Q-switched laser to direct light energy across your face. The laser energy is attracted to the carbon, destroying the carbon particles and impurities. 

The treatment offers a deep exfoliation while also targeting the bacteria that causes acne. The thermal effect of the laser also helps to minimise pore size and stimulate collagen production. 

A 2011 study showed that a series of 6 carbon laser facial sessions resulted in a 90% reduction of inflammatory acne lesions. 

Medical-Grade Peel

Medical grade peels are one of the best exfoliation treatments for acne-prone skin. The active ingredients in the chemical peel dissolve the dirt and dead skin cells that get trapped in the pores and cause acne to form.

There are many different chemical peel types, including a salicylic acid peel with a stronger concentration than over the counter products. In a 2018 study, freshly prepared salicylic acid peels were shown to reduce the number of comedones by 88.45% over a series of 6 treatment sessions. 

Your practitioner can adjust the strength of the peel to achieve the best results for your skin concerns. Stronger peels can also produce a strong collagen-boosting effect and encourage cell renewal. 

Laser Skin Rejuvenation

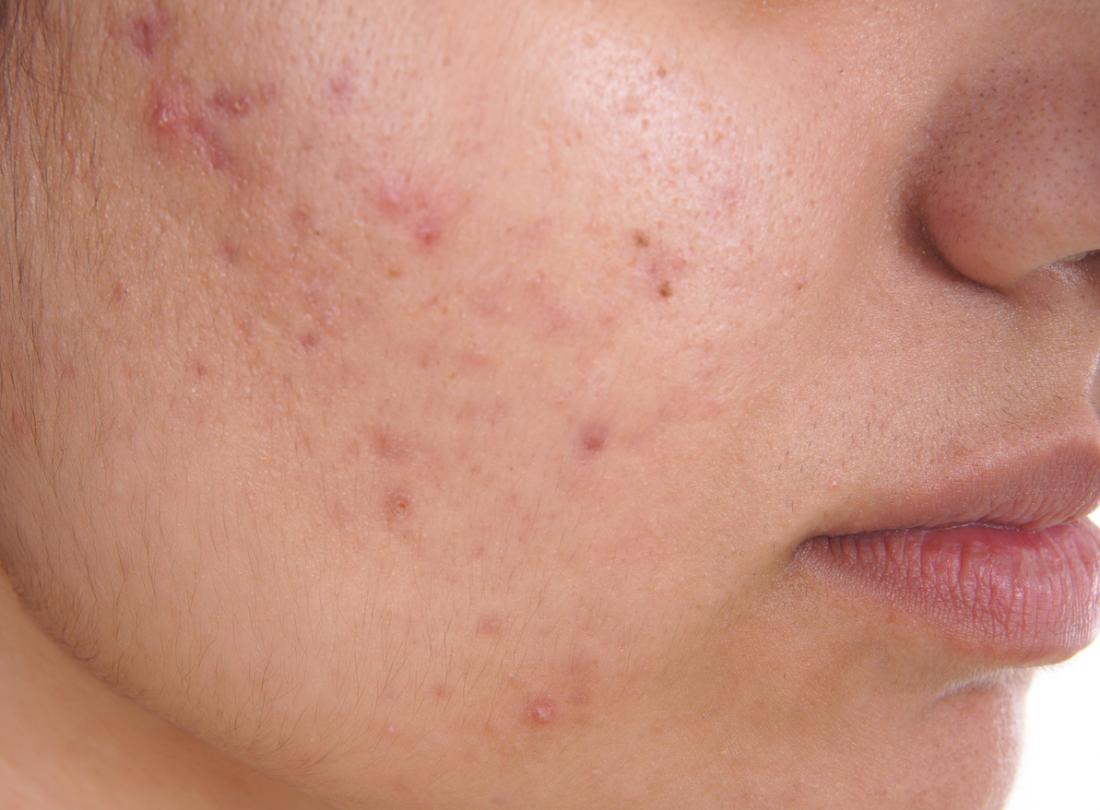
One of the most frustrating things about acne is that even after the red pustules have long gone, you can be left with acne scarring. This usually appears as an uneven skin texture with reddish or brown pigmentation. 

Laser skin rejuvenation is one of the most effective treatments for acne scars. It improves the texture and tone of the skin to help you achieve a smoother and brighter complexion. 

The laser energy stimulates collagen production and cell turnover to replace old and damaged cells with healthy new skin. There is a range of laser therapies, and the right one for you will depend on the severity of your acne scarring. 

Get Clean and Clear Skin With b clinic

The journey to acne-free skin starts with your at-home skincare regime. Benzoyl peroxide and salicylic acid can help you control your acne and prevent breakouts. They are great treatment options for mild acne. 

If you’re not getting results from these products or you’re experiencing severe acne, more effective in-clinic acne treatments are needed. Our experienced clinicians can help you on your journey to clearer skin. Schedule a free consultation today.

Tear Trough Filler Gone Wrong: What Can You Do About It?

Tear Trough Filler Complications

Wrinkles, sunken areas, and dark circles under the eyes can have a big impact on your self-confidence. Tear trough filler restores volume to lift and smooth the skin and make you look younger and fresher. 

It’s a super-effective way to rejuvenate your appearance without the risk and downtime of surgery. 

But like any cosmetic procedure, it can go wrong. Unfortunately, most botched tear trough filler procedures result from the injector not having enough experience and training. 

Keep reading to find the common mistakes and what you can do about under-eye fillers gone wrong. 

The Causes of Tear Trough Filler Complications

Most complications from tear trough fillers are the result of an inexperienced practitioner. The under-eye area is more complex than other places that are commonly treated with dermal fillers. The skin and tissue are thinner, so choosing the right filler product and injection technique is essential. 

Here are the most common tear trough filler treatment complications:

The Wrong Type of Dermal Filler Product Was Used

Dermal filler is made from a natural substance that is also produced in the body, hyaluronic acid. This dermal filler product is well tolerated by most people, but not all dermal filler products have the same consistency and quality.  

Some products are thicker and not very well suited to treat the delicate under-eye area. If the wrong type of dermal filler is used, it can increase the risk of swelling and unnatural-looking results. 

Incorrect Placement of the Filler

The tear trough is a delicate area. When the filler is not placed in the correct location, it shows through the thin tissue and skin of the under-eye. 

For most tear trough filler procedures, the product should be placed on top of the bone in the tissue plane. If the injections are too superficial in the skin, the filler product can create unnatural looking results. 

In some cases, the filler can create a blue discolouration of the skin, known as the Tyndall effect. It can also result in irregular lumps and swelling. 

The Patient Is Not a Good Candidate for Tear Trough Fillers

Some people are not suitable candidates for tear trough fillers. For example, many people seek tear trough fillers to improve the appearance of dark circles under the eyes. However, if the dark circles are caused by skin pigmentation, tear trough fillers are not the best solution. 

Dark circles caused by volume loss can be treated with fillers, but pigmentation is best treated with laser rejuvenation or other alternative procedures. 

If you have excess skin causing large under-eye bags, dermal fillers may not be the best treatment option. In some cases, lower eyelid surgery (blepharoplasty) is the most effective way to treat under-eye skin laxity and refresh the appearance of the eyes. 

When under eye fillers are performed on an unsuitable candidate, it provides unsatisfactory outcomes. 

Too Much Filler Product Was Used

With the skin and tissue in the under-eye area being very thin, an inexperienced practitioner can easily make the mistake of using too much filler. Small amounts of filler can have a significant impact on the delicate area under the eyes. 

The practitioner should take a conservative approach to under-eye fillers as more filler can be added later if necessary. 

When too much product is used, swollen pockets under the eyes after fillers is a common complication. The area can appear puffy, with irregular lumps. Too much filler can also cause the Tyndall effect and blue discolouration of the skin. 

An Unqualified or Inexperienced Practitioner

The most common cause of tear trough filler complications is an inexperienced or underqualified practitioner. 

Because of the rejuvenating results that can be achieved with under-eye filler, the procedure has become very popular here in Australia and around the world. But not all injectors are equipped with the experience and training they need to perform the procedure safely and effectively.

Almost all of the botched tear trough filler stories you hear are due to injectors with little training and no medical background making mistakes.

That’s why it’s so important to choose a reputable clinic with an experienced team of practitioners and cosmetic doctors. 

What To Do About Tear Trough Filler Gone Wrong?

One of the significant advantages of regular-based dermal fillers is that the effects can be reversed using a corrective enzyme product. The enzyme breaks down the dermal filler so the body can absorb it. Within 48 hours of the corrective treatment, the under-eye area will return to its pre-treatment appearance. 

The alternative is to wait for the effects of the dermal filler to wear off. However, tear trough dermal fillers can last from 6 months to over a year. The complications will become less noticeable over time, but most people prefer to dissolve the filler product with hyaluronidase to reverse the unwanted effects. 

How To Avoid Tear Trough Filler Complications?

The best way to avoid tear trough filler complications is to choose a clinic with experienced practitioners. The procedure has an excellent safety record and high patient satisfaction when performed by an experienced injector. 

Make sure that the clinic you choose has a good reputation and performs lots of tear trough filler procedures. You will need to attend a consultation before the treatment so the practitioner can assess the tear trough area and see if you are a good candidate for fillers. 

This is also an opportunity for you to ask questions about the training and experience of the clinician.

How To Fix Tear Troughs?

The best way to treat the tear troughs is with dermal filler injections. The dermal filler fills the hollows created by the loss of volume due to the ageing process. Tear trough fillers are an effective treatment to rejuvenate the under-eye area.

How Much Filler for Tear Troughs?

The amount of filler required for tear troughs can vary from person to person. Generally, clinicians will use 0.5ml to 1ml of dermal filler for the tear troughs. Your practitioner will use their experience and skill to determine how much filler is required to achieve optimal results. 

What Are the Side Effects of Tear Trough Fillers?

Serious complications from tear trough fillers are rare, but there are more common side effects that you should be aware of before treatment. 

The most common side effects include bruising, swelling, and tenderness in the treated area. For some people, these symptoms will only last for 24 hours after the procedure. In some cases, it may take a few days for the swelling and bruising to subside. 

Possible complications can also include infection of the injection sites, hyperpigmentation in the treated area, and ocular occlusion if a blood vessel is punctured during treatment. These more severe complications are rare. 

Are Tear Trough Fillers Risky?

Tear trough fillers are safe when administered by an experienced clinician. They can correct and rejuvenate the under-eye area without the risk and expense associated with more invasive surgical procedures. It’s important to choose a skilled and qualified practitioner and follow all perpetration and aftercare instructions to minimise the risk of complications and achieve optimal results.

To learn more about tear trough filler and see if you are a good candidate, schedule a free consultation with one of our board-certified practitioners here at b clinic.

Is Blue Discolouration After Dermal Fillers Normal?

Blue Discolouration After Dermal Fillers

Dermal fillers are one of the most effective and versatile non-invasive cosmetic treatments. You can restore lost volume and rejuvenate your appearance without the downtime that comes with surgical procedures. They’re also very safe when performed by an experienced practitioner. 

But there are possible complications. Bruising and swelling are common side effects, but some people also experience a blue colouring of the skin around the injection sites.

In this guide, we’ll look at the causes and treatment for blue discolouration after dermal fillers. 

What Should You Expect After Dermal Filler Injections?

Before we get to blue discolouration, it’s important to note what is expected after a dermal filler treatment. The gel-like substance in dermal filler products is made from a natural substance that also occurs in the body. That makes dermal fillers well-tolerated by the vast majority of people. 

For some people, there are no side effects other than slight redness around the injection sites for a few hours after the procedure. But for others, dermal fillers can cause:

  • Bruising
  • Swelling
  • Tenderness
  • Redness
  • Discomfort

These effects can last for up to a week, with symptoms becoming less noticeable each day following the injections. 

It’s also common for there to be some initial lumpiness depending on the area being treated. Your clinician will massage the area to smooth away lumps. They will also provide you with aftercare instructions to help the filler settle in the right place. 

What Is the Blue Discolouration After Dermal Fillers?

Blue discolouration is caused by the particles in the filler product reflecting light. This is known as the Tyndall effect. 

While bruising and swelling are relatively common side effects, the Tyndall effect is more unusual. It’s typically caused by the dermal filler product being placed too superficially under the skin. 

This can be due to poor injection technique or the wrong filler product being used for the treated area. 

How Do I Know if It’s Bruising or the Tyndall Effect?

In some cases, it’s easy to confuse the appearance of bruising with the Tyndall effect as they both cause blue discolouration of the skin. Bruising is caused when the filler injection needle damages the blood vessels beneath the skin and blood leaks into the surrounding tissue. 

That’s what causes the purple bruising after lip fillers that some people experience. 

While bruising resolves after a few days, the Tyndall effect lasts for much longer without corrective treatment. For example, if nasolabial fold filler goes wrong, it can take up to 9 months for the filler to break down. 

If you are unsure whether a bruise or the Tyndall effect is causing discolouration, you should contact the clinic that administered the dermal filler injections. They will be able to assess the area and determine what is causing the problem. 

What Causes the Tyndall Effect?

The dermal filler consists of a clear gel-like substance called hyaluronic acid. This is a sugar-based material that naturally occurs in the body. Although the dermal filler is clear, it contains lots of tiny particles that can reflect light. 

When the dermal filler is injected too superficially, light can reflect off the particles in the dermal filler, causing a blueish discolouration of the skin. If the filler is not spread correctly across the treated area and clumps together, it can increase the risk of the Tyndall effect.

It’s also more likely to occur in areas where the skin is thin, such as the lips, chin, and tear trough. 

Dermal fillers in the tear trough are the best way to treat dark circles, but it’s vital that the right filler product is used to avoid complications like blue discolouration.

How Long Does the Tyndall Effect Last?

Without treatment, the Tyndall effect will last until the body has absorbed the dermal filler product. This can take several months to a year, depending on the type of filler and the location of the injections. 

For example, filler in the nasolabial folds generally lasts for 6-8 months, while dermal filler chin augmentation can last for over a year. 

If treated with corrective hyaluronidase, the filler will dissolve within 24 hours, and the area will return to its pre-treatment appearance. 

How to Spot the Tyndall Effect?

The first sign of the Tyndall effect is often a raised area or bump in the treated area. This can indicate that the injection of filler is too superficial. 

It can be easy to mistake a bruise for the Tyndall effect. It’s also possible for the discolouration to only become noticeable a few days after the dermal filler treatment. 

You should contact your practitioner for a post-treatment consultation so they can assess the area and see if the Tyndall effect is causing discolouration. 

How Do I Prevent the Tyndall Effect?

There isn’t much you can do about preventing the Tyndall effect as a patient. The best way is to make sure you choose a reputable clinic with experienced and qualified practitioners. 

This complication is usually the result of poor injection technique or the wrong choice of filler product for the treated area. 

It’s important for the practitioner to assess the quality and integrity of your skin before treatment. An experienced injector will take steps to ensure correct needle depth and smooth technique to avoid overfill and achieve optimal results.

What Is the Treatment for the Tyndall Effect?

If the Tyndall effect is noticed at the time of treatment, massage can effectively redistribute the filler to resolve the problem. In some cases, a needle can be used to create a small hole in the skin so that excess product can be squeezed out. 

The longer the delay, the less likely massage and needle extraction will achieve the desired results. 

The most effective way to treat blue discolouration caused by the Tyndall effect is to dissolve the filler product using hyaluronidase. The corrective enzyme can resolve the problem within 48 hours of being applied. 

Hyaluronidase should only be used by an experienced practitioner, and the corrective treatment will need to be performed in a clinical setting. 

How To Prevent Bruising After Dermal Filler?

Bruising is a more common side effect of dermal filler injections. You can reduce the risk of bruising and swelling by avoiding alcohol consumption for 48 hours before your procedure. Alcohol is a vasodilator and increases the chances of blood vessels being damaged during the treatment. 

After the procedure, you can use a cold compress to reduce swelling and avoid rubbing or applying pressure to the treated area. 

You should also avoid strenuous activities that raise your heart rate and blood pressure for the first few days. This gives your skin time to heal and reduces the risk of irritation around the injection site. 

How To Choose a Cosmetic Clinic for Dermal Fillers

Before you have dermal filler injections, you will need to attend a consultation with the practitioner. This is so they can assess the area you want to treat, understand your desired outcomes, and ensure that you are a good candidate for dermal fillers.

The consultation is also an opportunity for your to ask questions and discuss any concerns you have. You can find out more about the practitioner by asking about their experience with dermal fillers and their qualifications. 

Dermal Fillers With b clinic

When performed by an experienced clinician, dermal fillers are a very safe cosmetic procedure. The risk of blue discolouration after dermal fillers is rare. It can also be quickly corrected if it does occur. 

If you’re worried about the treatment you received at another clinic, or you want to find out more about dermal fillers, schedule a free consultation today.

Microdermabrasion Aftercare Tips & What to Expect

Microdermabrasion Aftercare

Microdermabrasion helps you get smoother, younger-looking skin that is super soft & smooth  to touch. It’s one of the most popular treatments in Australia. 

If you’re thinking of booking a microdermabrasion session, you’ll probably have lots of questions about what it involves and what happens after a treatment session. 

In the guide, we’ll answer the most-asked questions about microdermabrasion. We’ll also share our top microdermabrasion aftercare tips to help you care for your skin and get optimal results. 

What Is Microdermabrasion?

Microdermabrasion is a two-step skin rejuvenation treatment that can brighten your complexion and reduce the appearance of fine lines and wrinkles. 

The first stage of the treatment acts on the outermost layer of skin. Your clinician will use a diamond head handpiece to buff away damaged and dead skin cells. The abrasive process clears away impurities and exfoliates the skin to encourage cell renewal.

The treatment is completed with a serum infusion or mask that is tailored to your aesthetic goals. 

Microdermabrasion is often combined with a skin peel or HA Peptide mask for an ultra-moisturising and nourishing effect. Your clinician can tailor the peel to your skin type and treatment goals to achieve optimal rejuvenation results. 

Ask your clinician about these add-on treatments during your free consultation.

What Does Microdermabrasion Do?

Microdermabrasion offers deep pore cleansing and exfoliation. It gently removes the top layers of skin, whisking away dead and damaged cells, impurities, and debris. After a session, your skin will appear smoother, more vibrant, and be softer to touch. 

Microdermabrasion is an effective treatment for a range of skin concerns, including:

  • Congested skin
  • Sun-damaged skin
  • Enlarged pores
  • Pigmentation
  • Fine lines & wrinkles
  • Excess oil production

According to a clinical study by the American Society for Dermatologic Surgery, microdermabrasion significantly improves the appearance of fine wrinkles, dullness, pigmentation, and large pores after just three sessions. After six sessions, results get even better. 

How Many Treatments Are Needed?

The number of microdermabrasion sessions required will depend on your aesthetic goals. For example, if you want to get a brighter and smoother complexion for a one-off social occasion, you can schedule a single treatment a week or so before the event. 

If you want to improve a specific skin concern like forehead wrinkles, you may need multiple sessions spread over a longer period. Your practitioner will advise you on the number of sessions required and the best treatment schedule during your free consultation at b clinic. 

Does Microdermabrasion Hurt?

You will experience mild scratching on the surface of your skin, but some clients have described this feeling as similar to the sensation of a rough lick of a cat’s tongue. Microdermabrasion is non-invasive and pain-free. 

How to Prepare for Microdermabrasion?

There is little to no preparation required. 

In the week before your session, you should take steps to avoid sunburns by wearing a broad-spectrum sunscreen during periods of sun exposure. You should also avoid harsh skincare products or other cosmetic procedures that make your skin more sensitive.

On the day of your microdermabrasion session, your skin should be product-free. You can apply makeup after the session. 

What Can I Expect After Treatment?

Immediately after treatment, your skin may appear pinkish and feel more tender than usual. This should fade within a few hours. There is a risk of bruising, but this is rare when an experienced practitioner performs the microdermabrasion. 

Over the next couple of days, you may experience a sensation similar to mild sunburn. There is no downtime, and you can go straight back to your regular routine after a microdermabrasion treatment. 

Microdermabrasion Aftercare Tips

Microdermabrasion stimulates cell renewal by buffing away the tired and dull-looking surface layers of skin. To achieve optimal results, you need to follow the aftercare instructions your practitioner provides. 

The following microdermabrasion aftercare tips help protect your skin and speed up the healing process for smoother, younger-looking skin. 

Use Sunscreen

It’s important to protect your skin from the sun’s powerful UV rays. During the first few days following treatment, your skin will be more sensitive to sunlight. You should try to avoid direct sun exposure if possible and use a broad-spectrum sunscreen. 

Avoid Products That Could Cause Irritation

You should avoid exfoliating products and products containing harsh ingredients that could irritate your skin for at least 72 hours following microdermabrasion. It’s also important to avoid rubbing or picking your skin during this time. 

Keep Your Skin Hydrated

After a microdermabrasion session, your new skin will feel softer and smoother than ever. It will also be more receptive to moisturisers. You can keep your skin feeling smooth and aid the healing process by using a gentle moisturiser as needed throughout the day. 

Avoid Strenuous Exercise

A good workout can lift your mood and give your skin a healthy glow, but you should avoid pushing yourself for a few days following microdermabrasion. Your skin will be more sensitive post-treatment, and sweating could lead to irritation. 

For the same reason, you should also avoid saunas and hot baths for a few days until your skin has fully healed. 

Don’t Use Blood-Thinning Medications

Aspirin and ibuprofen both have a blood-thinning effect that can slow down the healing process. You should avoid these medications and others that thin the blood for 48 hours post-treatment. It’s also advisable to avoid alcohol consumption until your skin has fully recovered. 

Revitalising Your Skin with Microdermabrasion

Microdermabrasion can help you get smoother, brighter, and softer skin with little to no downtime. If you want to learn more about this treatment and find out if it’s right for you, schedule a free consultation today. 

FAQs

How Frequently Can You Get Microdermabrasion?

The frequency of microdermabrasion treatments depends on the goals you want to achieve and how quickly your skin recovers after each session. You need to give your skin time to heal between sessions to achieve optimal results. 

For most people, sessions should be spaced around two weeks apart. Your clinician will assess your skin type and recommend a treatment personalised treatment plan during your free consultation.

Does Microdermabrasion Get Rid of Blackheads?

 A single treatment can provide deep cleansing of your pores. With each session, your skin will become clearer and brighter. 

The treatment also stimulates cell renewal and encourages the skin to slough, which helps to reduce the risk of new blackheads forming.

If you suffer from acne-prone skin, there are a range of treatment options to help you keep breakouts under control and get clearer skin. 

Is Microdermabrasion Bad for Your Skin?

No. Microdermabrasion is a non-invasive procedure that is safe for all skin types. There are no incisions, cuts, or need for anaesthetic. By encouraging cell renewal and exfoliating the surface layers, microdermabrasion helps your skin to be more healthy and younger-looking. 

Can Microdermabrasion Go Wrong?

When performed by a trained practitioner, there is minimal risk of microdermabrasion going wrong. Any side effects from microdermabrasion are usually mild and last no longer than a few days. If you feel any pain during or after a microdermabrasion treatment, inform your clinician. 

Can You Wear Makeup after Microdermabrasion?

You can apply makeup following a microdermabrasion session. However, it’s best to use high-quality mineral makeup rather than oil-based makeup as this allows the skin to breathe. 

Your clinician may suggest that you allow your skin time to heal and wait until the following day before applying makeup.

Which Chemical Peel Is Right for You?

Which Chemical Peel Is Right for You?

Chemical peels don’t sound like the most appealing skin treatment but don’t let the name put you off. 

A professional medical-grade peel could be your secret weapon for smoother and brighter skin. 

There are many different types and strengths of chemical peel, making it a versatile treatment for a range of skin concerns. But it also makes it challenging to know which peel is right for you. 

In this post, you’ll earn all about the different types of chemical peels so you can find out which is best for your skin type. 

What Are Chemical Peels?

Chemical peels are one of the most popular cosmetic treatments in Australia. A trained clinician applies a chemical solution to your skin.

The solution is left for a certain time before being neutralised and removed. 

The chemical solution penetrates the top layers of the dermis, causing the skin to peel to the desired depth. As the skin peels, sun damage, impurities, and dull skin are lifted away. 

Older skin cells are naturally replaced with smoother, fresher, younger-looking cells. 

What Are the Benefits of Chemical Peels?

The deep exfoliation achieved with a chemical peel offers several benefits, including:

Reduce Fine Lines and Wrinkles

Chemical peels are a powerful anti-ageing treatment. By peeling away the top layers of skin, a chemical peel removes the dead skin that has settled into wrinkles and fine lines. Smoother and younger-looking skin replaces the older, dull skin, making fine lines and wrinkles appear less prominent. 

Get a Brighter, Glowing Complexion

Depending on the type of chemical peel, you may be able to achieve significant results from a single treatment. Medium and deep chemical peels have strong collagen-boosting properties that help to restore springiness and leave you with youthful, glowing skin. 

Treat Acne-Prone Skin

Chemical peels help to remove dead cells and other impurities that clog pores and cause acne to form. By lowering the skin’s pH level, some peels also destroy the bacteria that causes pimples and inflammation. 

If you want to learn more about the causes of acne and the best ways to treat it, read our guide to achieving acne-free skin.

Make Skincare Products More Effective

A professional chemical peel removes the top layers of skin, allowing the active ingredients in topical products to penetrate the deeper layers. As a result, you’ll find your anti-aging products become more effective.

Types of Chemical Peels

There are many different chemical peel types, and some are more suited to specific skin types than others. All our peels are the most effective if done over the course of 4-6 treatments, 2-4 weeks apart. 

Lactic Acid Peel

A lactic acid peel is a gentle superficial peel that lightly exfoliates the skin, dissolving dead skin cells and impurities. It can help to reduce pore size and age spots that make your skin looker tired and dull. This type of peel is suitable for almost all skin types and has no downtime. 

Salicylic Acid Peel

Salicylic acid is a well known cosmetic ingredient that is great for exfoliation. This type of peel can be an excellent treatment for acne-prone skin. The salicylic acid dissolves the dead skin cells and impurities that cause pores to clog and lowers the skin’s pH level. 

Glycolic Peel

This peel ranges in strength to gently exfoliate the upper layer of the skin to gently and yet effectively treat sun-damaged skin, wrinkles, and brighten the skin. The glycolic acid has a strong collagen-boosting effect, stimulating the body to produce new proteins and making the skin appear smoother and younger-looking. 

Timeless/Vitamin A Peel

This versatile peel is primarily used as a superficial peel to target thinning of the skin and a dull complexion. It can also be administered in higher concentrations to target wrinkles and fine lines. Suitable for most skin types.

Jessner Peel

The Jessner peel is an effective treatment for oily skin, enlarged pores, and pigmentation. It’s a combination of salicylic acid, lactic acid, and resorcinol that provides a superficial to medium strength peel. Jessner peels can be tailored to your unique skin type. 

TCA Peel

Trichloroacetic acid (TCA) peels are one of the most popular non-invasive treatments for sun-damaged skin, photo ageing, and pigmentation. It can also be used to reduce the appearance of mild scarring. However, due to the strength of the TCA peel, this treatment is suitable only for lighter skin types. 

Which Chemical Peel Is Right for My Skin?

There are lots of different types of chemical peel. The medical-grade peels we offer at b clinic can be categorised as superficial, medium, and deep peels depending on the strength of the solution and how deeply they penetrate the top layers of skin. 

The best way to determine the right peel for your skin type is to schedule a consultation with one of our trained clinicians here at b clinic. 

We’ll examine your skin, listen to your aesthetic goals, and recommend the right strength and type of peel for you. Beautiful healthy skin is just a peel away.

For a limited time only, you can also get 20% of all skin peels at b clinic.

Book a Free Consultation Today

peels designed to refresh and revitalise your skin

How Many Peels Will I Need?

You may notice immediate improvement following a single chemical peel treatment, but the best results are achieved over a series of peels. Here at b clinic, we usually recommend a series of 4-6 peels depending on the peel type, your skin type, and the results you want to achieve. 

Are There Any Side Effects?

Side effects depend on the type and strength of the chemical peel. Generally, superficial peels have no downtime, while deep peels may require you to avoid certain activities and take it easy for a few days post-treatment. 

Deeper peels produce a stronger exfoliation that causes the top layer of skin to visibly peel in the days following treatment. You may also experience redness and mild skin irritation that feels similar to a sunburn. 

This is a normal part of the post-treatment process and is the desired effect to achieve the best results. 

During your free consultation, your clinician will explain what to expect following treatment and advise you on the ways you can manage any potential side effects. 

Can Chemical Peels Make Skin Worse?

A chemical peel will rarely cause a skin condition to appear worse. Redness, mild swelling, and peeling are part of the healing process following a peel and should subside within a few days of treatment. 

It’s important to choose a reputable clinic with experienced practitioners. If the wrong type of chemical peel is used or applied in too high a concentration, it may cause damage to the skin. In some cases, this could lead to hyperpigmentation or scarring. 

Do Chemical Peels Reduce Wrinkles?

Yes. Some types of chemical peel can help reduce the appearance of wrinkles, fine lines, and other visible signs of ageing. This is because the chemical solution causes a controlled micro-wound, removing the top layer of skin and allowing smoother, younger-looking new skin to grow in its place. 

Chemical peels are a well-established anti-ageing treatment. Multiple clinical studies show how chemical peels can help you to achieve younger-looking, wrinkle-free skin. 

Professional vs. At-Home Chemical Peels

The main difference between an at-home chemical peel and a medical-grade professional peel is the strength of the chemical solution and the results you can expect from the treatment. 

Professional chemical peels use a higher concentration of acid compared to commercially available products. You can expect more noticeable results from a professional treatment.

You should be careful with any chemical solution you apply to your skin, even in low concentration commercial products. 

A trained clinician can advise you on the best type of peel for your skin. This is especially important for people that have skin types more prone to potential side effects. 

How Long After a Chemical Peel Can I Breastfeed?

Although the chemical solution does not enter your bloodstream during the treatment, we do not recommend chemical peels if you are currently breastfeeding. 

There is very little research into the risks of chemical peels during the breastfeeding phase, so we prefer to be cautious and advise clients to avoid elective treatments until after they have completed breastfeeding.